
I know there are many apps and programs out there that provide the ability to create this effect, but when learning how to do something a bit more manually than an app will sometimes let you, you will be able to at time achieve better results, while being able to manipulate the effect in more ways.So if you have found this post while randomly stumbling through tutorials, what exactly is a plotagraph? Plotagraph is a fun little word for an animation created within a still photograph. I believe the name was created by the creators of Plotagraph Pro, but could be wrong. Definitely some software worth checking out, but if you’d like to learn a bit more about how these work, continue below.
So, it’s sort of like a GIF, yeah?
Kind of…only this particular effect references the animation of something that would normally be moving (fire, water, clouds) and creates a video from the final result, where certain parts move continuously, leaving the other aspects of the image still. I suppose you could also warp any other parts that you want to mess with? It’s a pretty fun, and trippy effect to apply to images!
In this tutorial, I will be guiding you through the steps in creating this effect from start to finish. In this tutorial, we will cover:
- Creating a plotagraph…I guess that’s it. Yep.
Here is a download link for the file I use within this project, incase you don’t have an image handy that you would like to use – Click here to download the photo
I have also created Photoshop actions to create this effect very quickly. If you’re like me, and usually not wanting to go through a long tutorial, and would like to learn how to use the actions, as well as download them for free, you can find that quick tutorial here –
Okay, if you’re still here and wanting to learn this, let’s get started in creating this plotagraph.
STEP 1:
Open an image (well…yeah)

STEP 2:
Make sure you size your image to something a bit smaller – closer to the size of standard 1080p or in that area. For this image, I sized it to 1920×1282. The image up there in the download link has already been sized to this.


STEP 3:
Make sure that you are working in the MOTION workspace. I suppose you could always choose to show the animation/timeline in your own workspace, but I like to not clutter my normal workspace. (yes, eggroll paradise)
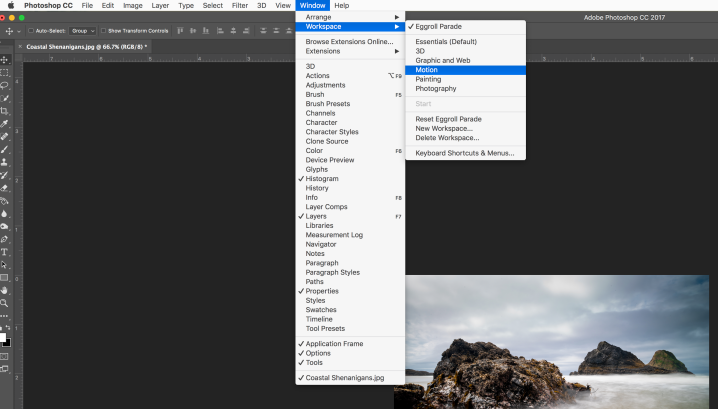
Doing this will bring up the timeline, where you will want to click on “CREATE VIDEO TIMELINE.” Make sure you click that, not “create frame animation”

That will then bring your clip up as shown below. 
STEP 4:
You will want to resize the clip to 6 seconds, as shown here. You can use the little zoom control at the bottom to make smaller adjustments. Make sure it is 6 seconds, because this is important for this tutorial.

STEP 5:
Duplicate the layer by right-clicking on what should be “Layer 0” unless you have renamed it. You could also press Cmd+J (Mac) or Ctrl+J (Windows) to duplicate layers, but then you will have to resize each clip (for whatever reason)

You’ll get this dialogue. Just click OK, otherwise you won’t be making any further progress. You could also just hit enter.

STEP 6:
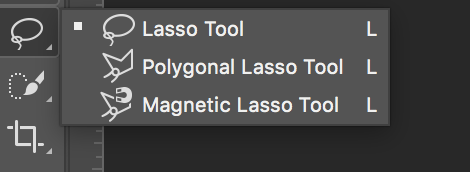
Grab your lasso tool as shown below, and set your feather settings to 1px (just what I normally use) I suppose for this tutorial, they could be set to 0px, but oh well.


Make a selection around the first part that you would like to add motion to. I split this into a couple sections, just to get a bit of different movement from different areas of water. You don’t have to be super precise on the selection, because we can clean that up later.

STEP 7:
Once you have made your selection, right click INSIDE the selection, and click on “select and mask.” In older versions of Photoshop, this should show up as “refine edge.”

Set a feather of 8. This is the only thing you will change within this dialogue.


STEP 8:
Click the add layer mask button as shown below to add this as a layer mask to this layer. You will see the layer mask appear on the layer as a black and white thumbnail showing your selection.


STEP 9:
Right-click ON THE LAYER MASK, and choose “apply layer mask” to apply the mask to the layer.

STEP 10:
Convert the layer to a smart object by right-clicking it, and choosing “convert to smart object.”

STEP 11:
Over in your timeline, click the dropdown arrow for (in this case) “Layer 0 copy,” unless you had changed your layer names. Make sure you are on the very first frame (the beginning of the clip) and click on the stopwatch for “transform.” This will create a keyframe, which will be how you are going to tell the program how and where you want it to animate/adjust/anything.


STEP 12:
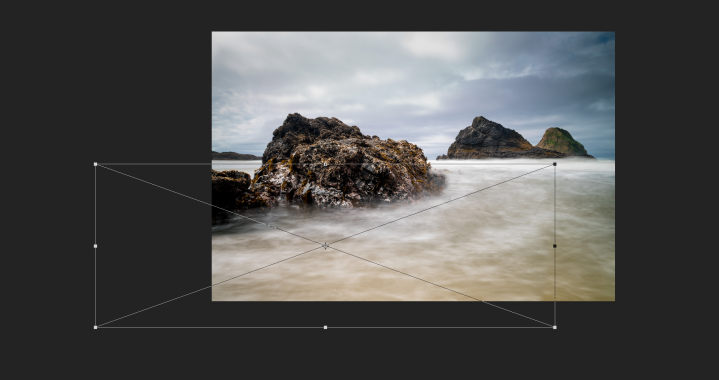
Head all the way to the very END of the clip now as shown below, and press Cmd+T (Mac) or Ctrl+T (Windows) on your keyboard to bring up the transform tool.

I scaled this section of water over to the left by just dragging the bottom left corner, and aligning slightly on the right where I saw anything hugely out of place.
Repeat those steps for all sections that you would like to add movement to, and we will fix overlapping errors in these next steps.
You will see that there are areas where the water overlaps these rocks, and we do not want that because it looks ick and gross and nasty like a sweaty badger. Let’s fix them.
STEP 13:
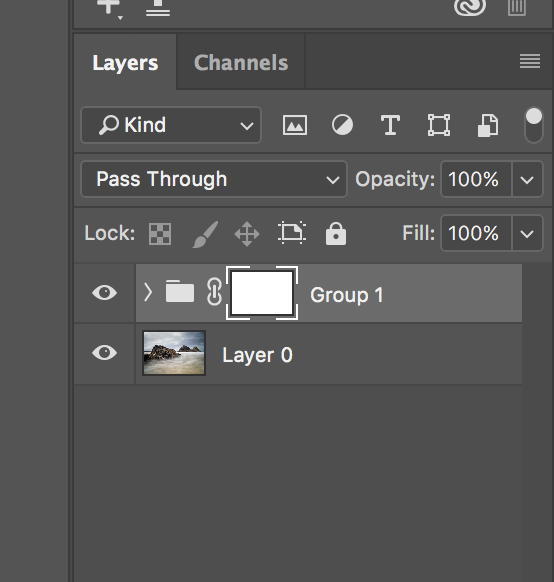
Select all layers with movement by clicking the bottom or top layer, and then shift+clicking to select the entire range of layers, just like selecting files.

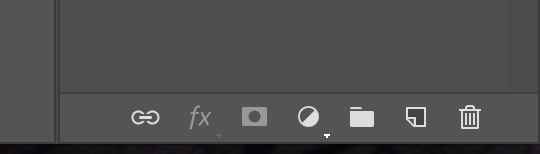
You will see this little folder icon in the bottom of the layers panel. Click that little shit to group all of these layers into one group.


STEP 14:
Again, click the “add layer mask” button in the bottom of the layers panel to add a layer mask to this group.
STEP 15:
Make a selection around all parts that you DO NOT WANT THE WATER TO OVERLAP.

STEP 16:
Grab a brush, and make sure that you have your layer mask selected in the layers panel. Using BLACK. Make sure your opacity and flow are 100%. Paint within the selected areas. You can also press “\” to toggle layer masks on or off so you can see what you have covered.


EXPORTING YOUR FILE:
Exporting the file can be done by going to FILE > EXPORT > RENDER VIDEO as shown below. I like to generally keep the settings at default, but will choose different locations for where files are saved to.

That’s pretty much it, now make things.
You can take this effect a step further by turning it into a seemingly never-ending video loop. If you would like to learn how that works, you can view the tutorial for that by clicking HERE.
TL;DR – Again, if you would like a quicker alternative by using the Photoshop actions I have created for this, you can download those HERE, and find the tutorial for how to use them HERE.
